How I Made This Blog
Using Gleam and Markdown for fun and... well not exactly profit.
"Yes, it was complicated. And yes it was time consuming. But look on the bright side: At least it's not very good."
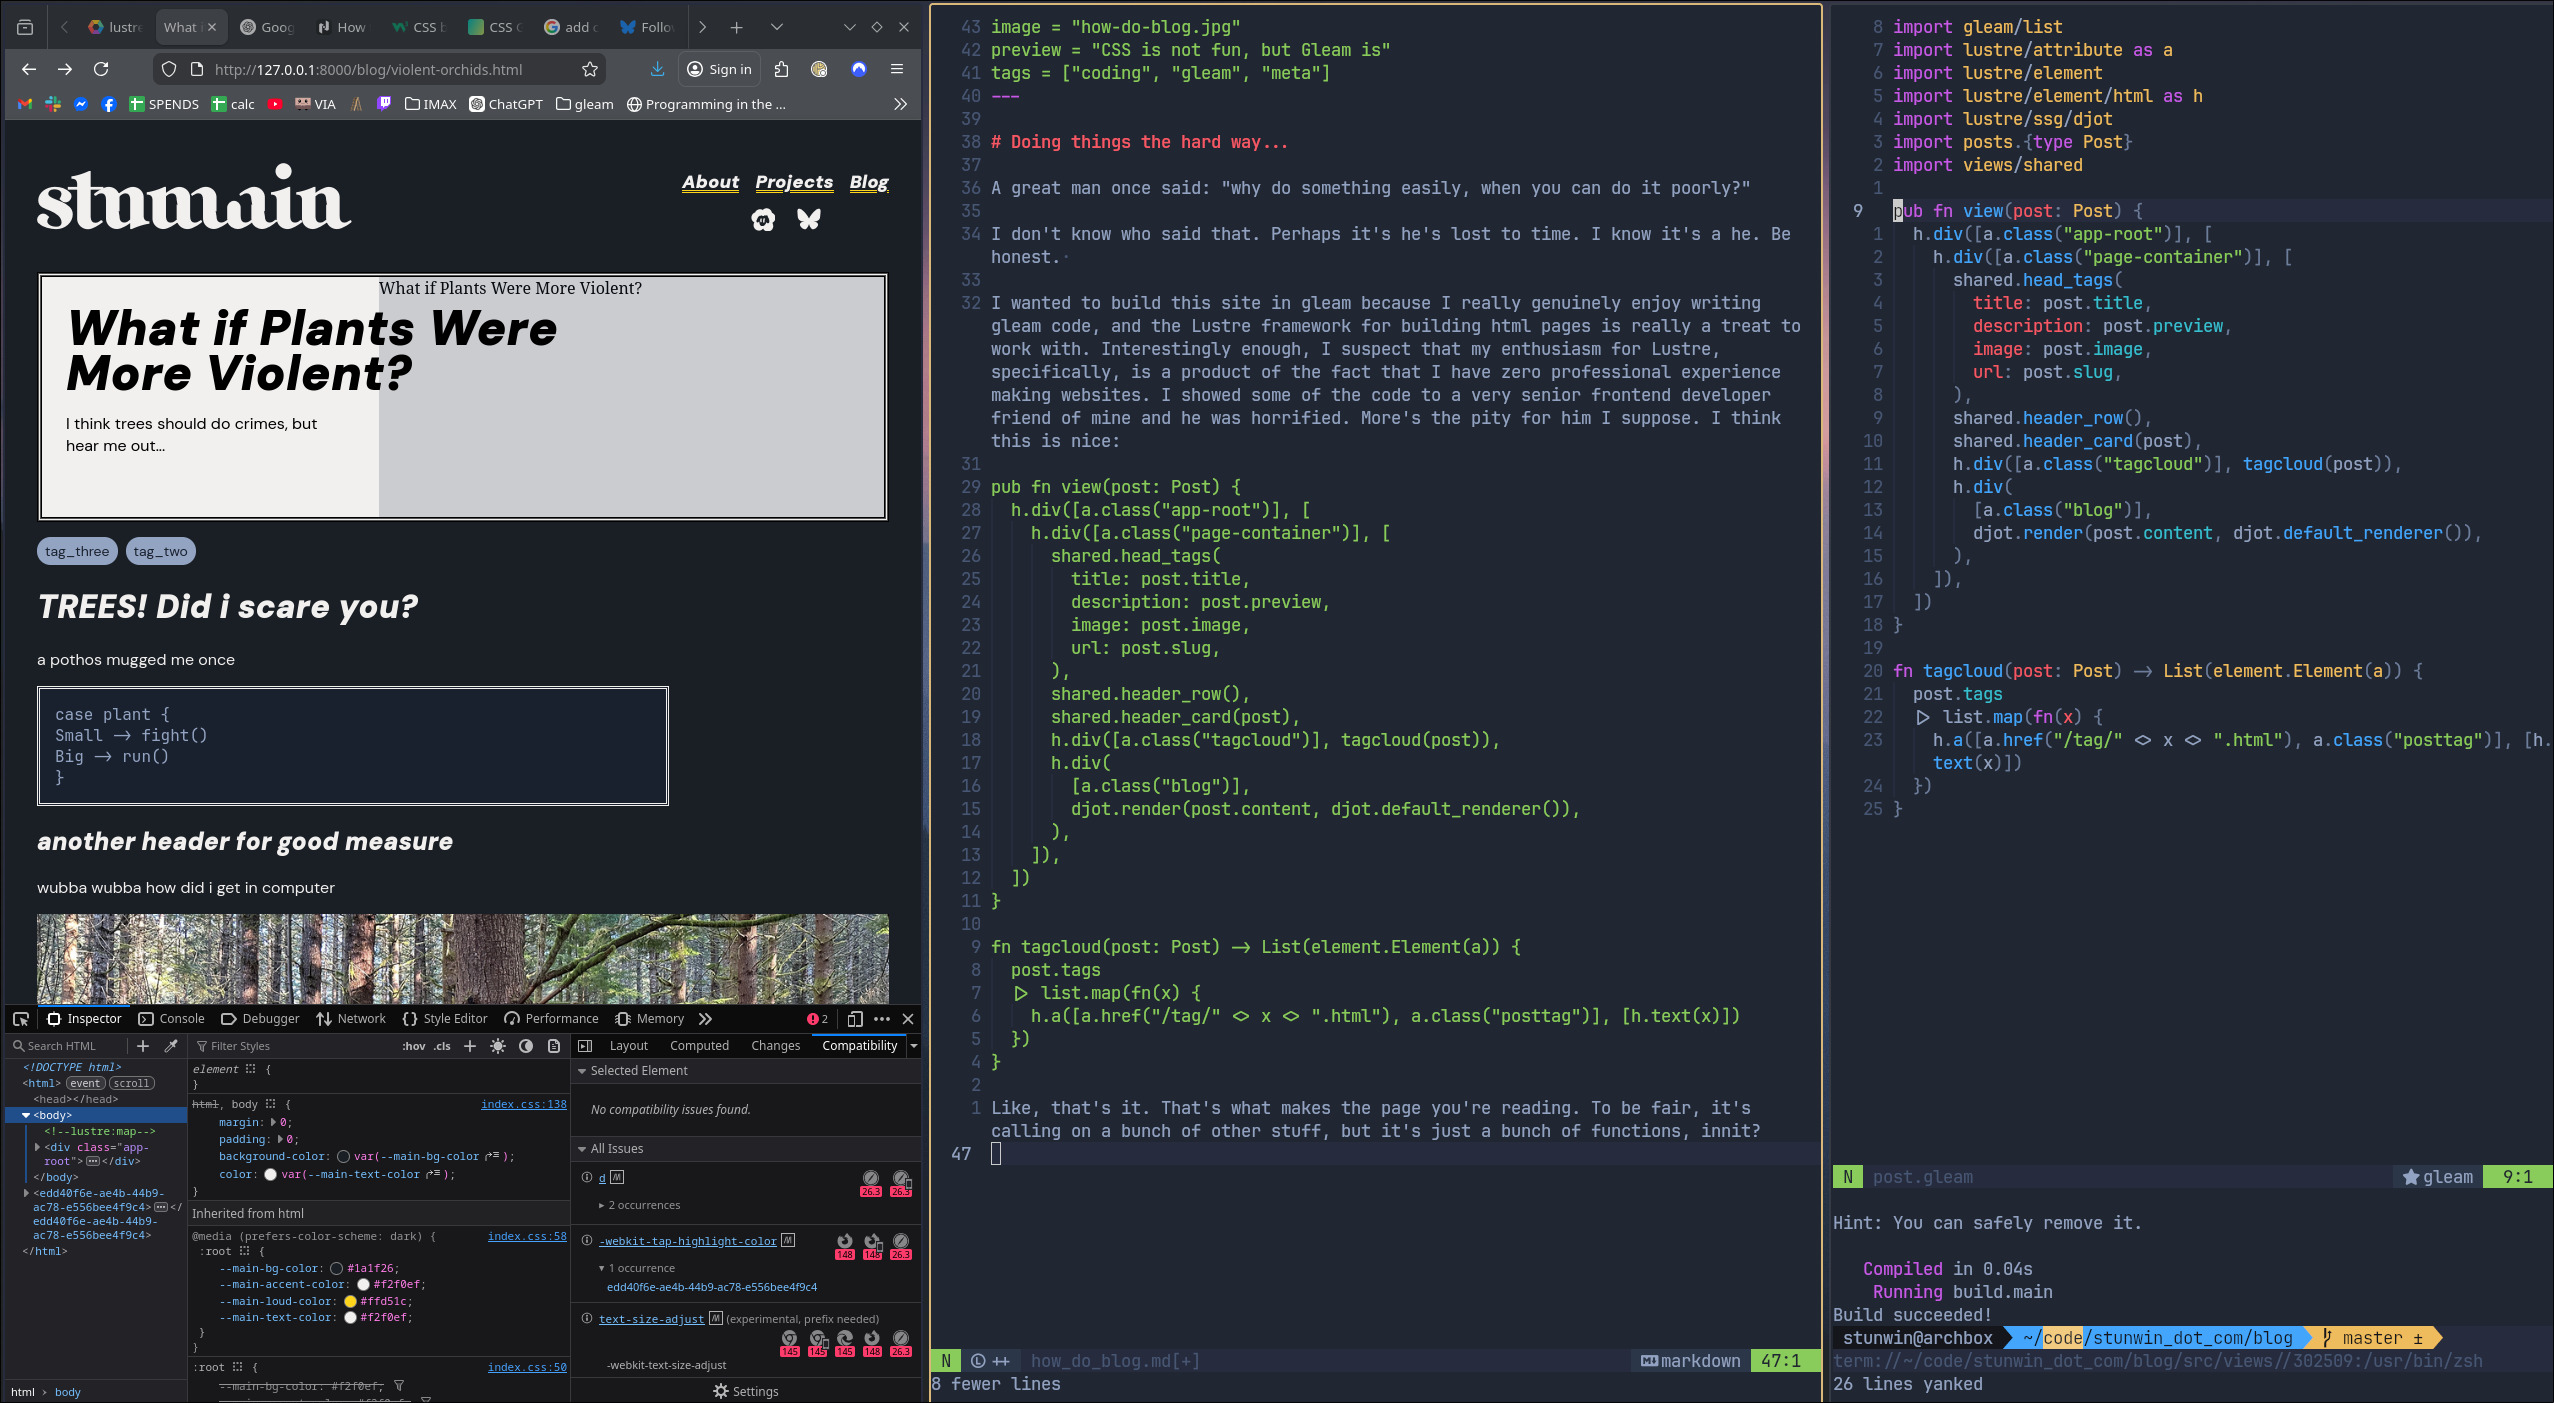
I wanted to build this site in Gleam because I really genuinely enjoy writing Gleam code, and the Lustre framework for building html pages is really a treat to work with. This isn't going to be a post about why I think Gleam is neat, but I'll write that one soon. All you need to know is that it's a functional, strictly-typed language that compiles to Javascript and Erlang, neither of which are particularly germain to this project.
Ok, so where do we start?
The source code is right here, by the way. Remember I'm just an advertising hack and not a professional developer.
Right, so we start with our build file, and line up all the different routes (pages, or groups of pages) we're asking it to make along with some config settings. For those of you who aren't functionally-minded that little |> guy basiclly pipes the results of the previous line into the current function as the first argument. In this case, it's taking a build configuration and adding instructions to it incrementally.
  let build =
    ssg.new("./priv")
    |> ssg.add_static_route("/", index.view(blog_posts_only))
    |> ssg.add_static_route("/about", post.view(aboutpage.1))
    |> ssg.add_static_dir("assets")
    |> ssg.add_dynamic_route("/blog", posts, post.view)
    |> ssg.add_dynamic_route("/tag", all_tags, feeds.view)
    |> ssg.use_index_routes()
    |> ssg.build
We're using the Lustre SSG library, which basically handles all of the actual file creation, and wants you to typically pass in some kind of routing string along with a view function.
(note that at the moment, the official package on the hex package manager is a version behind the repo, so if you want to use it, look at my gleam.toml to see how I'm pulling it down directly from github)
So let's take blog posts for example.
|> ssg.add_dynamic_route("/blog", posts, post.view)
We're going to dynamically generate a set of pages that live under /blog. The next argument needs to be a list of some type that can be accepted by your view function (which comes third).
First, you need to actually go though your folder of markdown files, and package them up in a way that the library can work with. That meand mapping over all the files in the posts folder with something like this that extracts the frontmatter, and builds everyting into a Post() type.
pub fn build_post(path: String) -> #(String, Post) {
  echo path
  let assert Ok(file) = simplifile.read(path)
  let assert Ok(toml) = djot.metadata(file)

  let p =
    Post(
      title: required_string(toml, "title"),
      slug: required_string(toml, "slug"),
      image: required_string(toml, "image"),
      preview: required_string(toml, "preview"),
      content: djot.content(file),
      tags: required_tags(toml),
      time: required_time(toml),
    )

  #(p.slug, p)
}

fn required_string(toml, field: String) -> String {
  echo field
  let assert Ok(value) = tom.get_string(toml, [field])
  value
}
...
et cetera. Like those echo keywords? Gleam makes print debugging easy like that. This library is not opinionated on to how to deal with meta data, so I'm using the djot library to separate out the markdown frontmatter, and then feeding that into the tom library which parces it in to YAML. From there, I can take the values and package them into a Post record that looks something like this:
Post(
title: "How to eat an elephant",
slug: "elephants",
image: "/img/elephant.jpg",
preview: "Hope you're hungry, because we have a lot of work to do!",
content: "the actual markdown body of the post",
tags: ["pachyderms", "morally-dubious-posts", "recipes"],
time: 03192601
)
Again the library doesn't have any opinion on how we use these values, so it's up to us.
Great, so what are we feeding this into? Our view function signature is dictated by the library:
pub fn view(post: Post) -> element.Element(a)
Where the Element type is what Lustre uses to build html. So that view function needs to build:
Head tags
The header row
Navigation
The tag cloud
The body of the post
The footer
And it looks a little something like this:
pub fn render_page(meta: HeadMeta, content: Element(a)) {
  h.html([], [
    head_tags(meta),
    h.body([a.class("app-root")], [
      h.div([a.class("page-container")], [
        header_row(),
        content,
        footer(),
      ]),
    ]),
  ])
}
Now this is obviously pretty generic, and the "content" variable smacks of "draw the rest of the owl", so let me show you what gets passed in for a blog post, specifically.
pub fn view(post: Post) -> element.Element(a) {
  let meta =
    shared.HeadMeta(
      title: post.title,
      description: post.preview,
      image: post.image,
      url: post.slug,
    )
  let content =
    h.div([], [
      card.header_card(post),
      h.div([a.class("tagcloud")], tagcloud(post)),
      h.div(
        [a.class("blog")],
        djot.render(post.content, djot.default_renderer()),
      ),
    ])
  shared.render_page(meta, content)
}

fn tagcloud(post: Post) -> List(element.Element(a)) {
  post.tags
  |> list.map(fn(x) {
    h.a([a.href("/tag/" <> x <> ".html"), a.class("posttag")], [h.text(x)])
  })
}
Oh a note on the actual rendering step. The Lustre SSG library uses the djot library to parse your "Markdown". I say "Markdown" in quotes because strictly speaking, djot isn't the same as markdown. But it's kind of like arguing there's a meaningful difference between Pokemon games. You'd be right, but you're not getting invited over for dinner again.
Now of course, the issue is that you need a way to put all your posts in the same place like a feed, so how do we do that? Same thing but different. We have all our posts. We can easily filter them by tag, or sort them by date, but then we need to decide on how the actual list of posts shows up. Here's what my solution looks like:
We have a function that draws the project cards:
fn linked_project_card(post_pair: #(String, Post)) -> Element(a) {
  let post = post_pair.1

  h.a([a.class("link-unstyled"), a.href("/blog/" <> post.slug <> ".html")], [
    h.div([a.class("project-card")], [
      h.div(
        [
          a.class("project-card__copy"),
        ],
        [
          h.h2(
            [
              a.class("project-card__title"),
            ],
            [h.text(post.title)],
          ),
          h.p(
            [
              a.class("project-card__desc"),
            ],
            [h.text(post.preview)],
          ),
        ],
      ),
      h.div([a.class("project-card__media")], [
        h.img([
          a.class("project-card__img"),
          a.src(post.image),
          a.alt(post.title),
        ]),
      ]),
    ]),
  ])
}
Side note: This should give you a good feel for what it's like to write html using the Lustre framework. Functions all the way down.
We take that view function and then map over a list of posts we want in that feed, sorted by the int in the time field of our Post record.
pub fn card_array(projects: dict.Dict(String, Post)) {
  let postlist =
    projects
    |> dict.to_list
    |> list.sort(fn(a, b) { int.compare({ a.1 }.time, { b.1 }.time) })
    |> list.reverse
  h.div([a.class("project-array")], list.map(postlist, linked_project_card))
}
And there you go. You have a lovely last-in-first-out list of posts.
Structurally, this is kind of the bulk of the work. Then we have to move on to styling which is the only part of this project I farmed out to the stochastic parrot machine.
hey chatGPT, here is a drawing of how i want my title cards to work, can you help?

>> Absolutely! <appeasement drivel and css>
After that it was just 450,000 hours of fiddling around with @media (using a phone but not a big one but also not a small one) and voila. A website with one blog post, that works about 20% as well as if I'd used a free template.
Feels good.
The repo lives on Tangled, which is "what if github, but not evil, and atproto?", which is then grabbed and hosted by Netlify. That took a moderate amount of fiddling since Netlify supports neither Tangled nor Gleam out of the box, which is why the repo contains the build files. That said, the Netlify CLI tool is actually really well thought out and easy to use. Just run netlify init in the project directory, follow the instructions, and omit a build command.
There is still a lot to do. Syntax highlighting, share-to-social buttons, and a literal endless list of refactoring and css fiddling await. But it's my silly little website and I made it myself, so that's got to count for something.